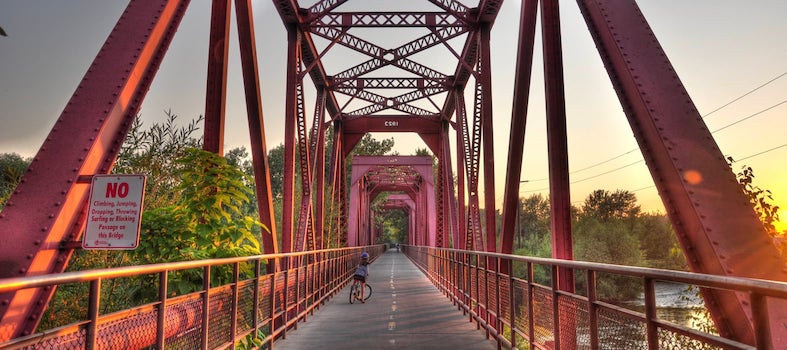
Project 2 Earthquakes and Boise River Bridge
A Project-based STEM+Computing Inquiry
About
This project was supported by the National Science Foundation (NSF) under Grant Number 1640228. Any opinions, findings, conclusions, or recommendations expressed in this project are those of the author(s) and do not necessarily reflect the views of the National Science Foundation. If you have any questions, please contact Dr. Dazhi Yang at dazhiyang@boisestate.edu or use our Contact Form.
Description
This project-based scientific inquiry project: Earthquake and Boise River Bridge Design is centered on researching different types of bridges, various aspects of earthquakes, and seismic safety features of bridges. In this project, students work in small groups to explore different bridge types, the destructive aspects of an earthquake, and the safety features for bridges that could resist earthquakes. Then students will design an earthquake-tolerant bridge and test their design with an earthquake simulator. To develop computational thinking and an understanding of STEM subjects, students from 4th, 5th and 6th grade will work in small groups of six, with one in-service teacher and one pre-service teacher, twice a week for eight weeks in a community centers after-school program.
Implementation
Please refer to the weekly activities (such as Week 1 Session 1 in the left sidebar and Resources from the sections below) for detailed information on how to use this project either in a classroom or an informal setting such as in community centers' after-school programs. The twice weekly sessions were originally designed to be 90 minutes in length, including a 10 minute break in the middle of the session. See photos of prior implementations on the projects' photo pages.
Week 3
Session 1
Questions
When building a bridge to hold weight, what ideas ensure success and why?
How should a bridge engineer change his/her design to meet the needs of the environment?
What information does a bridge engineer use to improve the construction of a bridge?
Goal
To design a successful bridge
To understand how earthquake occurs/p>
To understand the earthquake force
Activities
Bridge Design Challenges
Resources
K’NEX Directions
Outcomes
Demonstrate the design process to model a bridge
Session 2
Questions
What information does a bridge engineer use to design and construct bridges?
What shapes and materials can resist forces acting on bridge components?
Goal
To understand how to design a bridge according to a design plan
Activities
Sketch and draw a model bridge to design
Resources
Sketch paper
K'NEX set
Worksheet 1
Outcomes
Presentation on earthquake damages
How can we build a bridge for the Boise River that is strong enough to resist earthquake forces?
Entry Event 10 minutes
A teacher asks “What does a bridge engineer actually do?” PAUSEs, allowing the students to share ideas, reflect on their learning from the previous weeks, and the teacher offers suggestions. “How does a bridge engineer get started in designing a bridge?” PAUSEs for responses and compares student opinions. “When building a bridge, what must the engineer consider?” The teacher previews a video the students will watch. The video shows a bridge engineer discussing her occupation and design considerations. The teacher plays and directs the learners to take notes of what a bridge designer must do to be successful. After watching the video, the teacher informs the students that they will participate in three bridge design challenges using K’NEX pieces.
Group Challenges Small-group Hands-on Scientific Inquiry 50 minutes
A copy of the challenge directions will be provided to each group. The teacher stresses the importance of reviewing all challenge directions before starting to build the bridges.
The students are divided into small groups of appropriate size (2 or 3 individuals). Each group is given the directions and resources for each of the three Skill Builder Challenges.
The first challenge is approximately 20 minutes in length. The second and third challenges should run approximately 15 minutes. In the last 5 minutes, the students clean their work stations of K’NEX materials.
The teacher is the timekeeper, monitoring student efforts, and alerting them to the beginning of new challenges.
The teacher reminds the groups of design specifications for each challenge, and encourages students to think about how to record their measurements. Students should record their measurements for each challenge:
Challenge I: A) Maximum gap of your bridge span; and B) Maximum gap your bridge spans without sagging or bending
Challenge II: Maximum gap of your bridge span
5-minute break between challenge 2 & 3 if needed
Challenge III: Maximum gap your bridge spans without sagging or bending
Resources
15 K’NEX Rods of any length from the Real Bridge Building set
15 K’NEX Connectors of any color from the Real Bridge Building set
50g and 100g weights or slotted masses
Ruler
Safety Goggles
Reporting Back 5 minutes
The teacher debriefs the session, asking the students to report back their group measurements for each challenge. After discussing student measurements of their challenges, the teacher previews a video showing the . After viewing the video, the teacher asks “What happens if you do not design and construct your bridges carefully?” The teacher and students comment on the conditions that must be considered in bridge design and construction.
End of Session Reflection and Debriefing 5-10 minutes
Using the Problem Solving Process Diagram, the teacher will ask students to identify what kind of problem solving skills/process/computational thinking they used in this session and explain how they used it. The following are some sample questions that can guide the debrief.
What did I learn today?
What problem solving skills/processes or CT components in this diagram did I use today?
How did I use the problem solving skills/processes/CT components?
How can we build a bridge for the Boise River that is strong enough to resist earthquake forces?
Entry Event 5 minutes
A teacher asks “What knowledge must a bridge engineer have to be successful?” PAUSEs, allowing the learners to share ideas, reflect on their journal observations from the previous weeks. The teacher offers suggestions. “How can someone become a bridge designer?” PAUSEs for responses and compares learner opinions. “What STEM knowledge is essential for a bridge engineer to know?” The teacher previews a video the learners will watch that shows a bridge engineer discussing how to structure and design a strong bridge. The teacher plays and instructs the learners to make notes in their journals of what a bridge designer needs to know to be successful. After watching the video, the teacher informs the learners that they will have the opportunity to design and build their own bridge using K’NEX pieces.
Sketch a Bridge Model 15 minutes
After watching the video, students will begin their sketch of a bridge at his/her choice. The teacher directs the students, “It is your turn to design a bridge based off of the information you have gained from the previous sessions. Just like an engineer, you will sketch a drawing of the bridge you plan to design on the supplied draft paper. I have left the K'Nex rods for you to observe, since these are the supplies you will be using to build with. You may design any bridge you would like based on your research in the previous lessons. Experiment with shapes and sizes. You have fifteen minutes to design and sketch your bridge before we share our designs with each other. Any questions?” Teacher PAUSEs for questions and let the students begins.
Students Presentations 10 minutes
Suggested approach: Half of the students hang their drawings up or display them in any way, and present their drawings to the remaining students. Students describe the choices they made within their designs to their peers. After 5 minutes, the two groups of students switch roles with the original presenters becoming the audience and the other half presenters. The students will vote for the best three designs and then build the bridges according to the design they chose in small groups.
Build a Bridge and Test it 45 minutes
The students work in a small group (2-3 individuals) to build their bridge based on the design/sketch they chose. The teacher is the timekeeper, monitoring student efforts and alerting them be mindful of the design requirements (according to the sketch). The teacher needs to encourage students to think about how to work in teams. After completing the building, the students will use books or weights to test their bridges. In the last 5 minutes, the students clean their work stations of K’NEX materials and get ready to share their bridges.
Resources
A K'NEX Set
Books
Weights
Ruler
Safety Goggles
Optional: Internet access to search for additional, relevant information.
1-2 pieces of draft paper for each student
Pencils
15 K’NEX Rods of any length from the Real Bridge Building set
15 K’NEX Connectors of any color from the Real Bridge Building set
End of Session Reflection and Debriefing 5-10 minutes
Using the Problem Solving Process Diagram, the teacher will ask students to identify what kind of problem solving skills/process/computational thinking they used in this session and explain how they used it. The following are some sample questions that can guide the debrief.
What did I learn today?
What problem solving skills/processes or CT components in this diagram did I use today?
How did I use the problem solving skills/processes/CT components?
Session 1
Entry Event: How to Build a Durable Bridge
Closing Event: Best Jobs: Galloping Gertie Tacoma Bridge
Resources Provided for Activity
Each group in the challenge needs:
15 K’NEX Rods of any length from the Real Bridge Building set
15 K’NEX Connectors of any color from the Real Bridge Building set
50g and 100g weights or slotted masses
Ruler
Safety Goggles
Session 2
Entry Video: How to build a durable bridge
Resources for Simulation 1
Each group in the challenge needs:
A selection of K’NEX Rods and Connectors
Building instructions Booklet
Books or weights (500g-1000g)
Safety goggles
Resources for Simulation 2
Each group in the challenge needs:
K’NEX Real Bridge Building set
Building instructions: Book 2 for the Astoria Bridge
Books or weights (10g-1000g)
Safety goggles
Ruler