Project 2 Earthquakes and Boise River Bridge
A Project-based STEM+Computing Inquiry
About
This project was supported by the National Science Foundation (NSF) under Grant Number 1640228. Any opinions, findings, conclusions, or recommendations expressed in this project are those of the author(s) and do not necessarily reflect the views of the National Science Foundation. If you have any questions, please contact Dr. Dazhi Yang at dazhiyang@boisestate.edu or use our Contact Form.
Description
This project-based scientific inquiry project: Earthquake and Boise River Bridge Design is centered on researching different types of bridges, various aspects of earthquakes, and seismic safety features of bridges. In this project, students work in small groups to explore different bridge types, the destructive aspects of an earthquake, and the safety features for bridges that could resist earthquakes. Then students will design an earthquake-tolerant bridge and test their design with an earthquake simulator. To develop computational thinking and an understanding of STEM subjects, students from 4th, 5th and 6th grade will work in small groups of six, with one in-service teacher and one pre-service teacher, twice a week for eight weeks in a community centers after-school program.
Implementation
Please refer to the weekly activities (such as Week 1 Session 1 in the left sidebar and Resources from the sections below) for detailed information on how to use this project either in a classroom or an informal setting such as in community centers' after-school programs. The twice weekly sessions were originally designed to be 90 minutes in length, including a 10 minute break in the middle of the session. See photos of prior implementations on the projects' photo pages.
Week 6
Session 1
Questions
How do we design and build a strong bridge to counter an earthquake for Boise river?
What are the considerations for building a strong bridge?
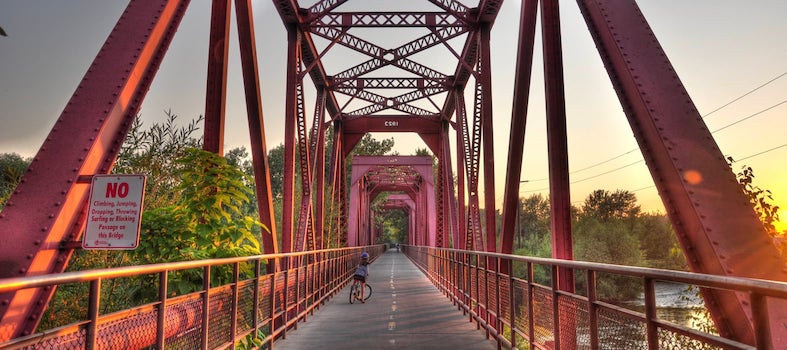
Virtual field trip to Broadway bridge
Goal
To build a strong bridge for Boise river
Activities
Bridge presentations: what we learned
Resources
Face to face discussion with bridge engineer
Readings
Outcomes
Presentation on foundations of bridges
Session 2
Questions
Task Challenge: Design and Construct a bridge over the Boise River to resist an earthquake
Goal
To build a strong bridge for Boise river
Activities
Building a bridge
Resources
Materials needed to build a bridge
Shake Table
Outcomes
Journal with answers to questions on bridge observations
How can we build a bridge for the Boise River that is strong enough to resist earthquake forces?
Interactive Session with Bridge Engineers 60 minutes Virtual Field Trip
A bridge engineer will come and have a face-to-face session with the students. Students will watch the videos of the Capital Bridge, Friendship Bridge, and the Broadway Bridge near the Boise State Universality's campus and interact with a bridge engineer.
1. Virtual Field Trip to Capital Bridge
2. Virtual Field Trip to Friendship Bridge
3. Virtual Field Trip to Broadway Bridge
Please print out this handout for students to guide their in asking the questions for a bridge engineer.
Watch this video presentation of the Broadway bridge.
As part of this activity students should identify:
The structural concepts used in the bridge design and how they were applied
The types of forces acting on the bridge and how the design accommodated them
The materials used in the construction and why they were used in preference to other available materials
The properties that made these materials suitable for use in the bridge design
Why it was built on its present site
Why the particular type of bridge design was chosen for this site
The challenges facing the engineers when creating the design for the bridge and how they were solved
The alternative designs that were considered and why were they rejected
How the bridge was constructed, the problems encountered and how the engineers solved them. How the construction engineers prevented it from collapsing before it was completed
The need for the bridge and whom it serves
How the building of the bridge impacted the local environment, for example:
Were the local communities impacted by increased or reduced traffic/quality of life issues; what effects did its construction have on businesses in the area?
What was the impact of the construction of the bridge and new access roads on local habitats and wildlife? Did air and noise pollution from vehicles increase?
If, in their opinion, the bridge is a successful structure, they should be prepared to justify their answer
Student Led Presentation 15 minutes
The students discuss the design process of a bridge and the different things needed to consider when designing a bridge based on the knowledge acquired in today's and previous sessions. This session could be best facilitated by the bridge engineer(s).
End of Session Reflection and Debriefing 5-10 minutes
Using the Problem Solving Process Diagram, the teacher will ask students to identify what kind of problem solving skills/process/computational thinking they used in this session and explain how they used it. The following are some sample questions that can guide the debrief.
What did I learn today?
What problem solving skills/processes or CT components in this diagram did I use today?
How did I use the problem solving skills/processes/CT components?
How can we build a bridge for the Boise River that is strong enough to resist earthquake forces?
Entry Event 10 minutes
The teacher starts the session by saying that the students will be participating in a design competition starting this session and it will last until the last session of this project. The design challenge involves the design of a bridge across the Boise River that they discussed last week. Their knowledge from last week will come in handy during this competition.
Notes: This activity will be done in two parts. In part 1 students plan, design and sketch. In part 2 they build and test. They will have more chance to fix their designs and retest to complete the competition.
Final Design Challenge
This challenge is intended to help students learn and develop and range of key skills including, communication, planning, team building, and problem-solving, as they work on a design project in which they take a product (a bridge) from the design phase through to its final construction and testing. Their bridge must meet cost and time parameters laid down in the specifications. The team that can design and successfully construct a bridge that meets the design specifications at the lowest cost will win the challenge!
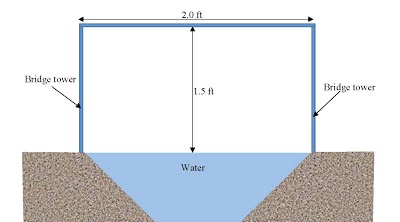
Design Specifications:
1. The bridge should consist of two towers connected by a pedestrian walkway
2. Each of the towers should be on either side of the Boise River. Assume the Boise River is 2 ft wide!
3. The bridge deck should be 1.5ft from the water.
Step 1 - Loading Requirement: The completed bridge must be capable of supporting a load of 2 kg weight placed anywhere on the bridge deck; the bridge must remain level when loaded.
Step 2 - Earthquake Performance: The completed bridge should be stable against earthquake and the Table below provides an explanation of the bridge performance criteria after the earthquake.
Description |
Performance Remark |
|---|---|
All pieces still tightly connected |
OK |
Some pieces loose or falling |
Caution |
Whole parts of bridge fell |
Failure |
Bridge should get OK or Caution remark to move to the next stage
Step 3 - Reloading Requirement: The bridge will be loaded after the earthquake event and it should be able to support 1.5kg weight placed anywhere on the bridge deck.
Designing, Planning, Preparation of Plans, and Allocation of Roles 60 minutes Part 1
What to do first 20 minutes
Review the design competition details for the bridge and the rules of the competition.
Make sure that all members of your team understand what has to be accomplished and the rules of the competition. If unsure, ask your teacher to explain.
Good planning is the key to any successful project. During this phase, it is up to your team to look at the resources available – human as well as material – and to plan how best they can be utilized to complete tasks within the time available.
What to do next 40 minutes
As a team, decide what type of bridge will meet the design specification.
Brainstorm ideas:
Use a flip chart (if available) or a large piece of paper to write down everyone’s ideas before discussing them one by one.
Every person on the team has a valid contribution to make and every idea should be evaluated on its merits.
Remember to check with the job specifications to make sure your ideas keep on track.
Finalize the decision about the bridge type you will design.
Assign tasks to team members.
Produce plan drawings (front, side and top elevations).
Decide how the bridge will be constructed.
Produce estimates for the K’NEX building materials.
Present the bridge design/sketch for the project to your teacher before the end of this session.
End of Session Reflection and Debriefing 5-10 minutes
Using the Problem Solving Process Diagram, the teacher will ask students to identify what kind of problem solving skills/process/computational thinking they used in this session and explain how they used it. The following are some sample questions that can guide the debrief.
What did I learn today?
What problem solving skills/processes or CT components in this diagram did I use today?
How did I use the problem solving skills/processes/CT components?