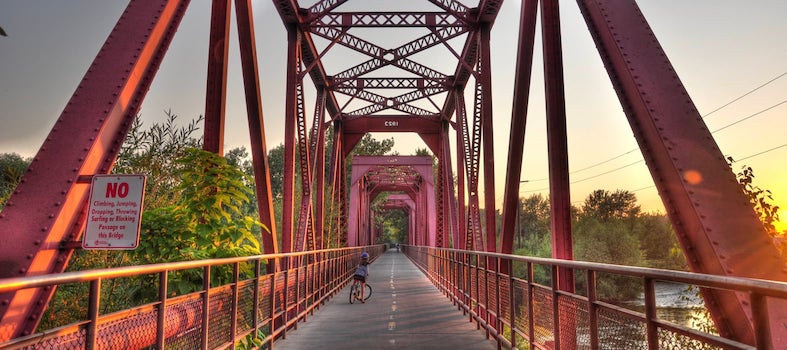
Project 2 Earthquakes and Boise River Bridge
A Project-based STEM+Computing Inquiry
About
This project was supported by the National Science Foundation (NSF) under Grant Number 1640228. Any opinions, findings, conclusions, or recommendations expressed in this project are those of the author(s) and do not necessarily reflect the views of the National Science Foundation. If you have any questions, please contact Dr. Dazhi Yang at dazhiyang@boisestate.edu or use our Contact Form.
Description
This project-based scientific inquiry project: Earthquake and Boise River Bridge Design is centered on researching different types of bridges, various aspects of earthquakes, and seismic safety features of bridges. In this project, students work in small groups to explore different bridge types, the destructive aspects of an earthquake, and the safety features for bridges that could resist earthquakes. Then students will design an earthquake-tolerant bridge and test their design with an earthquake simulator. To develop computational thinking and an understanding of STEM subjects, students from 4th, 5th and 6th grade will work in small groups of six, with one in-service teacher and one pre-service teacher, twice a week for eight weeks in a community centers after-school program.
Implementation
Please refer to the weekly activities (such as Week 1 Session 1 in the left sidebar and Resources from the sections below) for detailed information on how to use this project either in a classroom or an informal setting such as in community centers' after-school programs. The twice weekly sessions were originally designed to be 90 minutes in length, including a 10 minute break in the middle of the session. See photos of prior implementations on the projects' photo pages.
Week 8
Session 1
Questions
Task Challenge: Design and Construct a bridge over the Boise River to resist an earthquake
Goal
To determine which bridge is the strongest
Activities
To test the bridge
Final testing (competition)
Resources
Shake Table
Laptops
Video/Tape Recorder
Outcomes
A group test of their bridges
Session 2
Questions
Task Challenge: Design competition for a bridge over the Boise River to resist an earthquake
Goal
To determine which bridge is the strongest
Activities
Focus Group Interview
Surveys
Resources
Laptops
Video Recorder
Tape Recorder
Outcomes
Individual group debriefing
How can we build a bridge for the Boise River that is strong enough to resist earthquake forces?
Entry Event 5 minutes
This session is a continuation of the design challenge that started in Week 6 session 2. Students are asked to recollect their experience last week with bridge design and construction. Depending on what went wrong with their particular bridge, students are given 10 minutes to discuss what changes they think will result in a better bridge performance.
For teams whose bridges passed the required specifications, they are asked to check the economy of the bridge. Students go through the table below and estimate the total cost of their bridge. Then, they try and optimize their design to meet specifications for a lower cost bridge.
Redesigning, planning, preparation of plans and rebuilding
What to do first 10 minutes
Review the test results from the bridge testing
Review the design task challenge again understand the rules of the competition.
Make sure that all members of your team understand what has to be accomplished and the rules of the competition. If unsure ask your teacher to explain.
Good planning is the key to any successful project. During this phase it is up to your team to look at the resources available – human as well as material – and to plan how best they can be used to complete tasks within the time available.
Redesigning and Preparation of Plans 20 minutes
Brainstorm ideas to improve the design:
Use a flip chart (if available) or a large piece of paper to write down everyone’s ideas before discussing them one by one.
Every person on the team has a valid contribution to make and every idea should be evaluated on its merits.
Remember to check with the design details to make sure your ideas keep on track.
Assign tasks to team members.
Produce plan drawings (front, side and top elevations).
Decide how the bridge will be constructed.
Produce estimates for the K’NEX building materials.
Present the bridge design for the project to your teacher before the end of this session.
Rebuilding 20 minutes
Students can modify the bridges they built in the last session. If the bridge completely collapsed after the testing in the last session, they start from scratch. If not, they can just modify existing bridge. This will be the final design of the bridge that will be tested in the next session.
Cost Estimations 25 minutes
If the teams have completed their design, they will estimate the cost of their bridge by using the table (will be provided to students by teacher) provided. The lowest cost of the bridge that meets the design specifications wins! This cost estimation activity could be matched more closely to math curriculum.
Student Led Presentation 10 minutes
The students discuss their experiences and consider what are most important aspects of this process to share. This discussion should follow the individual group roles. The students discuss their decisions for how to best proceed with the bridge-building project with other groups. The teacher asks questions to clarify student choices and reasoning.
End of Session Reflection and Debriefing 5-10 minutes
Using the Problem Solving Process Diagram, the teacher will ask students to identify what kind of problem solving skills/process/computational thinking they used in this session and explain how they used it. The following are some sample questions that can guide the debrief.
What did I learn today?
What problem solving skills/processes or CT components in this diagram did I use today?
How did I use the problem solving skills/processes/CT components?
How can we build a bridge for the Boise River that is strong enough to resist earthquake forces?
Preparation for Final Competition 25 minutes Competition Day
Students are given ten minutes to prepare their bridges for the final competition. They make any last minute changes to their bridge.
Cost Estimations: For the final designs that were built, students estimate the cost of their bridge by using the table (will be provided to students by teacher) provided. The lowest cost of the bridge that meets the design specifications wins!
Bridge Testing 45 minutes
Once all teams have completed building their bridges, the teacher starts the testing process that includes loading, earthquake simulation and reloading.
Loading Requirement: The bridge should support 2 kg anywhere on the load without any bending
Earthquake Performance: The bridge should receive ‘OK’ or ‘Caution’ performance remark
Reloading Requirement: The bridge should support a loading of 1.5kg anywhere in the load without any bending
Judging the Performance
The judge compares the costs and the performance of the bridges and determines the winner. Here is the Final Competition Evaluation Form.
Reminder
Please help make sure all students' work/artifacts/journals are collected by the project team;
All students have completed a post survey at the end of the program. (This could be completed prior to the final competition testing/judging)
Solve problems by using Medium Motor Block, Wait Block, and Touch Block.
End of Session Reflection and Debriefing 5-10 minutes
Using the Problem Solving Process Diagram, the teacher will ask students to identify what kind of problem solving skills/process/computational thinking they used in this session and explain how they used it. The following are some sample questions that can guide the debrief.
What did I learn today?
What problem solving skills/processes or CT components in this diagram did I use today?
How did I use the problem solving skills/processes/CT components?
Session 1
Session 1
K'NEX Sets
Shake Tables